iOS CoreData for Dummies — Part 1
This is 2024, and the last time I used CoreData was like back in 2021 😲. So, yes this is a new refreshment for me to share what I’ve learnt from “re-learning” about CoreData.

Before that, we know that there are lots of way to persist User Data in our app, we called this Data Persistance / Persistance Storage. What is a data persistance? Why do we even need it in the first place?
Data persistence in iOS refers to the process of saving data so that it remains available even after the app is closed or the device is restarted. Persistent data is stored in a way that allows it to be retrieved later, ensuring continuity for the user experience.
Here we sometimes stumbled a case when there’s a need to save our user’s data locally, or saving application state like what language does our user choose, dark or light mode selected, or even supporting offline mode. “But you can store their data in Servers”, yes but not always necessarily needed. As we know, storing and retrieving data in Servers may take some processing time, thus using Persistance Storage approach might be essential. There are lots of way to “store” user’s data, like User Defaults, Realm, File System, Keychain, but we’ll focus on setting up your first core data.
What’s a Core Data?
Core Data in Swift is a powerful framework provided by Apple for managing the model layer of your applications. It serves as an object graph and persistence framework, enabling developers to efficiently manage the lifecycle of data, perform CRUD (Create, Read, Update, Delete) operations, and persist data locally in iOS, macOS, watchOS, and tvOS applications.
Imagine the core data as a SQL relational based model data base.

The diagram looks something like this, we have an Entity (class representation / blue print of our data), viewContext (This is the class used to represent entities in Core Data) that we used to do CRUD, and SQLite (yes Core Data use a SQLite as the relational data base). So, this is like doing some Query SQL using Swift! Let’s get started!
1. Create your project
You could include storage core data initially, our create it manually as well. There isn’t any much different though.


2. Creating a new Entity

Directly on your CoreData create a new Entity, as you see there are predefined type that you can choose, like UUID , String, Int16, Int32, etc.
TLDR; CoreData only able to save a primitive and foundation data type as mentioned above, it ensures light and quick way to access, storing, and dequeuing data. But, what about if we want to save data like UIColor, UIImage? Here’s the Transformable come to help, but we’ll get to it later on.
The default type is optional, make sure to check un-check if needed.
3. Entity’s Relationship
Now, we already have a Spender Entity, let’s assume I have a case that each Spender could spend More than ONE spending Logs.
As we know, CoreData is built on top of a SQLite. We’ll map the logic like this, Spender has a One to Many Relationship with SpendingLog, right?


Under Relationship, create a new attribute, and choose the destination as the related Entity, also choose the type to be To Many. There won’t be any Inverse as per now, but you’ll see it later on.


On the other hand, on SpendingLog create a new relationship, choose destination, and choose the inverse. Boom, it’s now related!
But, why use a relationship approach? Why can’t we just use Transformable, and custom it as a Spender have a Set / Array of Logs? Here’s a thing to considers:
A. Querying and Fetching Efficiency
- Relationships: Core Data allows you to fetch related objects (e.g.,
Logsfor aSpender) directly using fetch requests, predicates, or sort descriptors. You can query specific logs efficiently without loading everything at once. - Transformable: When using
Transformable, the entire collection (e.g., an array or set of logs) is serialized and stored as a single binary blob. Every time you need the data, Core Data must deserialize the entire object. You lose the ability to query individual logs efficiently.
B. Data Integrity and Relationships:
- Relationships: Core Data automatically manages data consistency and referential integrity. It ensures that deleting a
Spendercan also delete all associatedLogsif set up with a cascade delete rule. - Transformable: You need to manually manage the integrity of data (e.g., ensuring all logs are updated or deleted correctly).
C. Lazy Loading and Faulting:
- Relationships: Core Data uses lazy loading (faulting) for relationships. This means related objects (e.g.,
Logs) are only loaded when accessed, saving memory and improving performance. - Transformable: Entire data must be deserialized at once, which can be inefficient for large datasets.
D. Core Data Features
- Relationships allow you to use predicates for filtering, sort descriptors for ordering, enable cascade deletes and inverse relationships (e.g., from
Logback toSpender). - Transformable doesn’t support these features natively, as it treats the data as a single block.
4. Generating the Entity Class
We could have 2 options to generate our entity class
- Auto generate from Xcode
- Manually generating

The default option is the Class Definition Xcode automatically generates NSManagedObject subclasses for each entity in the Core Data model using Command + B (build project and CoreData entities). However, since the code is auto-generated, it is not directly editable.
I would recommend to choose Manual/None as we’ll need to modify our object further on, to do that, choose editor, and Create NSManagedObject Subclass. Make sure our destination, and below group is the same!


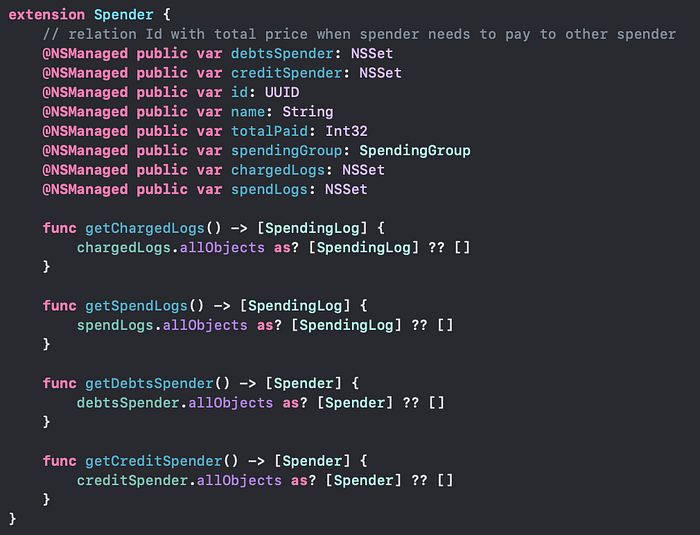
5. NSSet for to Many?
You will notice that our spendLogs data type is only NSSet, why?

- If you define a relationship where an entity can relate to multiple objects (e.g.,
One Category -> Many SpendLogs), Core Data represents this as a collection, specifically asNSSet. NSSetis used because it ensures uniqueness and doesn't enforce ordering, making it efficient for Core Data's internal use.NSSetis immutable, which aligns with Core Data's goal to manage the underlying data integrity. You can convert it to a mutable version (NSMutableSet) if needed.
To get our Logs data correctly, we’ll need to manually cast our NSSet into a set of SpendingLogs, like this
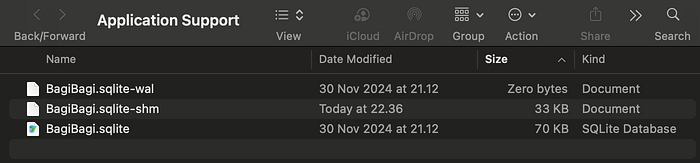
6. SQLite File Location
As i mentioned above, CoreData use a relational database approach to store and query the data. To get the SQLite file, just print using this code below, and open the path in your terminal using open path...
let storeURL = FileManager.default.urls(for: .applicationSupportDirectory, in: .userDomainMask).first!
print("Core Data Path: \(storeURL)")
You’ll get the data like this
We’ve already covered some of the basic knowledge of the Core data, including Entity, Relationship, getting data from relationship. Next we’ll get to know more about
- Basic CRUD
- Common Core Data issues
- Performing core data task in Background Thread
- CoreData in Main vs Background Thread
- Unit Testing
See you!